
-
Embracing Challenges: Navigating Golf Course Hazards with Positive Energy


Introduction:
Welcome to Positive Energy Golf, where we believe that every challenge on the golf course presents an opportunity for growth and improvement. Today, we’re diving into the world of hazards – those strategically placed obstacles that test your skills and decision-making. Understanding the different types of hazards, their corresponding color markers, and the penalties involved will empower you to approach them with a positive mindset. Let’s explore how hazards can elevate your game and bring out the best in you!
Water Hazards:
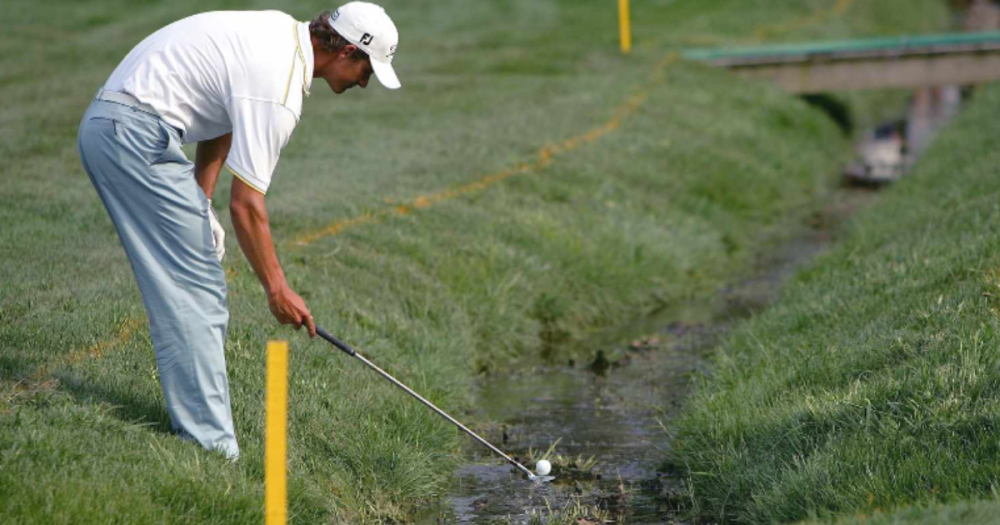
Water hazards, often represented by yellow stakes or lines, can be found on many golf courses. These can include ponds, lakes, rivers, or even artificial water features. When your ball comes to rest in a water hazard, you have a few options. You can play the ball as it lies if you dare, but remember, the water can be an unforgiving foe. Alternatively, you can take a penalty stroke and drop a ball behind the point where your original shot crossed the hazard’s edge, keeping it in line with the flagstick.

Lateral Water Hazards:
Lateral water hazards, distinguished by red stakes or lines, run parallel to the fairway or course. They often include streams or ditches. If your ball finds its way into a lateral water hazard, you have similar options to those of a regular water hazard. You can play the ball from the hazard with caution, or take a penalty stroke and drop within two club lengths from where your ball last crossed the hazard or use the point where it entered the hazard as a reference point.

Bunkers:
Bunkers, the sandy nightmares that can disrupt your progress, are typically indicated by white stakes or lines. These hazards are strategically placed throughout the course, challenging your ability to escape their clutches. If your ball lands in a bunker, grab your sand wedge and embrace the challenge. You may not ground your club in the sand before making your shot, and remember, you can’t remove loose impediments within the bunker. Aim to escape with finesse and continue your round, knowing that mastering bunker play is an essential skill.

Out-of-Bounds Areas:
Out-of-bounds (OB) areas are identified by white stakes or lines, and they mark the boundaries of the golf course. When your ball finds its way out of bounds, the penalty is severe. You must play a provisional ball from the original spot, adding one stroke to your score. If you’re unable to find your original ball, you’ll have to re-tee and add another penalty stroke. Embrace the challenge of staying in play, as OB areas demand accuracy and precision.
Penalty Areas:
Penalty areas, often signified by a combination of yellow and red stakes or lines, can include a variety of hazards such as marshes, swamps, or deep rough. These areas present unique challenges, but they also offer opportunities to showcase your creativity and problem-solving skills. If your ball ends up in a penalty area, you have the option to play it as it lies, or take a penalty stroke and drop a ball within two club lengths of the reference point, keeping the point where the ball last crossed the edge of the penalty area between the hole and the spot where you drop.
Conclusion:
Navigating hazards on the golf course is an integral part of the game. By embracing these challenges with a positive mindset, you can turn them into opportunities for growth and improvement. Remember to familiarize yourself with the different types of hazards, their corresponding color markers, and the penalties involved. Use your creativity, skill, and resilience to navigate these obstacles, and watch as your game reaches new heights. Stay positive, keep swinging, and enjoy the journey of becoming a better golfer, one hazard at a time!
-
SuperStroke 3.0 Grip Change to Traxion Pistol GT 1.0 Putter Grip How To & Review
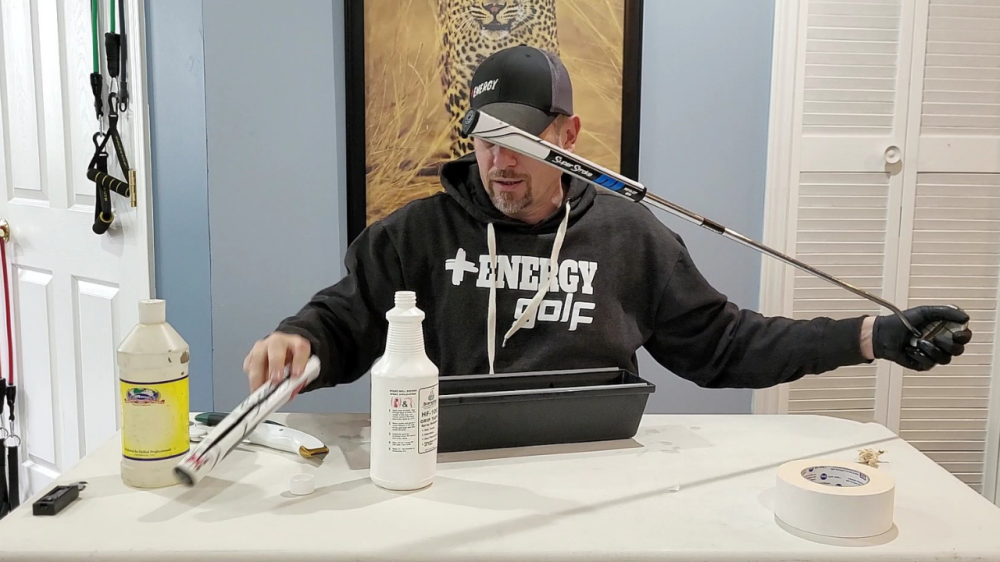

SuperStroke 3.0 to SuperStroke 1.0 Putter Grip How To & Review
SuperStroke putter grips have been growing in popularity on the tour for a few years now. A few months ago I decided to go with the SuperStroke Traxion Tour 3.0 Putter Grip and after using it a few time out on the course as well as on the putting green, I decided that the 3.0 was a bit too thick for my liking. For me the thicker grip didn’t have the feel I was hoping for, which is why I decided to change out the 3.0 with the SuperStroke Traxion Tour 1.0 Putter Grip. In the video below I will walk you through step-by-step on how to remove the larger putter grip and how to easily install the new much slimmer one.
- Purchase your new SuperStroke Putter Grip – Check Prices on Amazon Here
- Gather all needed supplies to install your SuperStroke Grip (Double Sided Tape, Grip Tape Solution, Hook Blades, Utility Knife, Mud Pan, Acetone, and a towel)
- Grab your putter
- Remove old grip by inserting hook blade and pulling away from you, peel back the grip. If you have any tension just reinsert the hook blade as you are peeling back the grip, it should come off pretty easily.
- Remove old double sided tape. Use utility knife with a regular blade to scrape off the tape, it should come off pretty easily. Wipe it down with the acetone to remove the old glue.
- Measure double sided tape to the length of your new putter grip and cut it
- Apply the double sided tape to your putter leaving a little over hang at the top of the putter shaft, tuck the tape into the hole at the top of the putter shaft.
- Wrap the tape around the putter shaft and remove the other side of the tape exposing the outer sticky part of the tape
- Pour your grip tape solution onto your new putter grip holding it over your mud pan while plugging the hole on the bottom of your grip with your finger.
- Once the grip is full with the solution pour it over the double sided tape, which you can just pour it or remove your finder from the hole in the bottom of your grip and let it flow out over the grip tape, either way will work fine. Either way hold it over your mud pan so you don’t make a mess and can save the tap solution as you can reuse it.
- Slide your new putter grip onto the shaft and over the double sided tape, it should slide on very easily.
- Once on, tap the end of the club on the floor a few times to make sure your golf grip is all the way on.
- Once on you will want to line up your grip with SuperStroke facing front and the gray line facing back (SuperStroke should face the hole and the gray strip should face away from the hole when holding your putter) Please note that you have plenty of time to line this up so there is no need to panic and rush through this. Test is out before setting it aside to dry.
- Wait 3-4 few hours (I usually wait 24 hours) to give it time to dry.
Installing your new SuperStroke putter grip at home without using a vise is no big deal and should only take a few minutes to complete. If you have any issues, comments, tips or tricks I would love to hear from you. I again appreciate you taking the time to stop by and I hope you found this post useful.
Here are the Links for everything you will need:
- SuperSroke Traxion Pistol Grip 1.0 Black/White/Blue: https://amzn.to/46EeOuO SuperSroke
- Traxion Pistol Grip 1.0 White/Grey/Red: https://amzn.to/3PPoixf SuperStroke Traxion Tour
- Golf Putter Grip 3.0 White/Grey/Red: https://amzn.to/46AJdKx
- Double Sided Golf GripTape: https://amzn.to/3JQoXee
- Grip Tape Activator Solution: https://amzn.to/3O4n3ZR
- Utility Knife: https://amzn.to/3XIsrVE
- Hook Blades: https://amzn.to/3D66B4Z
- 12″ Pan: https://amzn.to/44gru9G
-
Navigating Out of Bounds: Understanding Markers and Recovery Strategies

Navigating Out of Bounds: Understanding Markers and Recovery Strategies
Introduction:
In the game of golf, one of the challenges that golfers encounter is finding themselves out of bounds. Whether it’s an errant shot off the tee or a wayward approach, out of bounds can quickly lead to penalty strokes and frustration. In this blog post, we will shed light on what out of bounds markers are, their colors, the stroke penalties associated with them, and provide practical strategies to help you recover when you find yourself in this predicament. With the right mindset and knowledge, you can turn a potentially disastrous situation into a positive opportunity for recovery.
Identifying Out of Bounds Markers:
Out of bounds markers are strategically placed to define the boundaries of a golf course. They serve as visual indicators that separate the playable area from areas where the ball is considered out of bounds. These markers are usually small posts or stakes and can be found near the course perimeter or designated areas. They are typically painted white, but in some cases, they may be yellow or red, depending on the course’s specific rules.
Color-Coded Markers and Stroke Penalties:
a) White Markers: The most common color for out of bounds markers, white signifies that the area beyond the marker is out of bounds. When your ball crosses a white out of bounds marker, you must play your next shot from the original spot where you last played, adding a one-stroke penalty to your score.
b) Yellow Markers: Yellow markers may be used to indicate a lateral hazard or a special local rule for out of bounds. When your ball crosses a yellow out of bounds marker, you have two options. You can either proceed under the stroke-and-distance rule, returning to the original spot and adding a one-stroke penalty, or you can choose to drop a ball within two club lengths of where the ball last crossed the marker, keeping a straight line between the hole, the point of crossing, and the spot where the ball is dropped. Again, a one-stroke penalty is added to your score.
c) Red Markers: Red markers are typically used to identify a water hazard. If your ball crosses a red out of bounds marker, you have the same options as with a yellow marker. You can proceed under the stroke-and-distance rule or take a drop within two club lengths, keeping a straight line between the hole, the point of crossing, and the spot where the ball is dropped. Both options incur a one-stroke penalty.
Recovering from Out of Bounds:
When you find yourself out of bounds, it’s important to remain composed and make strategic decisions to minimize the impact on your score. Here are some recovery strategies to consider:
a) Assess the Situation: Take a moment to evaluate your options and the potential risks and rewards associated with each. Consider factors such as the distance to the nearest point of entry, the lie of your next shot, and any potential obstacles that could affect your recovery.
b) Apply the Appropriate Penalty: Understand the specific penalty associated with the out of bounds marker and ensure you add the appropriate stroke(s) to your score before proceeding.
c) Utilize the Stroke-and-Distance Rule: If you choose to apply the stroke-and-distance rule, return to the original spot where you last played and re-hit your shot. Focus on regaining your composure and executing a controlled swing to avoid compounding the mistake.
d) Take a Drop: If the course allows for dropping within two club lengths, carefully select a spot that provides the best opportunity for a successful recovery. Ensure you adhere to the rules regarding the spot, maintaining a straight line between the hole, the point of crossing, and the drop spot.
e) Embrace a Positive Mindset: Remember that golf is a game of challenges and opportunities. Approach your recovery shot with a positive mindset, focusing on making the best possible next shot rather than dwelling on the mistake.
Conclusion:
Navigating out of bounds can be a daunting experience for any golfer. By understanding the purpose and characteristics of out of bounds markers, as well as the associated stroke penalties, you can approach these situations with clarity and confidence. Implementing strategic recovery strategies will help you minimize the damage and stay focused on getting back on track. Remember, even when the ball finds itself out of bounds, there’s always an opportunity for a positive outcome. Stay calm, assess your options, and trust in your ability to recover and continue enjoying the beautiful game of golf.
-
The Winning Wedge: Mastering the Art of Scoring from 120 Yards Out


Introduction:
In the game of golf, it’s often said that “drive for show, putt for dough.” While long drives are certainly impressive, it’s the finesse shots that truly separate the winners from the rest. One shot that often poses a challenge for many golfers is the approach from 120 yards out. A well-executed wedge shot can make all the difference, and having the right wedge in your bag is crucial to scoring success. In this blog post, we will delve into the importance of selecting the proper wedge and explore how it can help you become a more confident and effective golfer.
Precision Matters:
When it comes to golf, precision is key, and the importance of accuracy is magnified as you near the green. Hitting your approach shot from 120 yards out demands precise yardage control, spin, and the ability to stop the ball on the green. A well-designed wedge tailored to your playing style and preferences will provide you with the confidence to execute these shots consistently.
Versatility for Every Situation:
Different lies, varying wind conditions, and bunker placements can make each approach shot unique. Having the right wedge allows you to adapt to these situations, making it easier to handle any challenge you may encounter. With a diverse array of wedge lofts and bounce options available, you can select the perfect club to match your desired trajectory and shot shape, ensuring you have the necessary tools to conquer any obstacle on your path to the pin.
Finding the Perfect Fit:
The ideal wedge selection goes beyond brand names and popular choices. It’s about understanding your own game and selecting a wedge that complements your swing characteristics. Professional club fittings can provide valuable insights into your swing dynamics, such as attack angle, clubhead speed, and release pattern, helping you identify the best wedge options for your game. Remember, the right wedge is the one that feels comfortable in your hands and gives you the confidence to execute your desired shots.
Optimal Yardage Gapping:
While many golfers focus on their driver and iron distances, it’s equally crucial to consider the yardage gaps in your wedge game. Having the right wedge at your disposal allows you to control your distances effectively, ensuring you have a club to hit confidently from 120 yards out. By fine-tuning your wedge setup, you’ll be able to attack the pin with precision, increasing your chances of hitting more greens in regulation and lowering your scores.
Practice, Practice, Practice:
Even with the perfect wedge in hand, consistent practice remains paramount to success. Spending time honing your skills from 120 yards out will improve your ability to strike the ball cleanly and control your distances effectively. Use your practice sessions to experiment with different shot types, develop a reliable swing rhythm, and build confidence in your wedge game. The right wedge can enhance your performance, but it’s up to you to put in the effort and practice to make the most of its capabilities.
Conclusion:
Golf is a game that requires mastery of a multitude of shots, and the approach from 120 yards out is undoubtedly a critical one. Investing in the right wedge, tailored to your game and preferences, can significantly enhance your scoring potential. The right club will provide the precision, versatility, and confidence necessary to conquer challenging approach shots, enabling you to navigate your way closer to the pin with ease. Remember, the road to success lies not only in selecting the perfect wedge but also in dedicating time to practice and refine your skills. So, grab your wedge of choice, head to the practice range, and watch your scores improve as you dial in your approach shots from 120 yards out. Happy golfing!
-
Unlock Your Straight Shot Potential: Mastering Accuracy Off the Tee with Positive Energy Golf
Introduction:
Welcome to Positive Energy Golf, where we believe that success on the golf course is not just about technique and skill, but also about harnessing the power of positive energy. In this blog post, we will delve into one of the most sought-after skills in golf: hitting straighter shots off the tee. Whether you’re a seasoned golfer or just starting out, we have some valuable tips and insights to help you unleash the power of accuracy off the tee.
1. Set Up for Success:
A straight shot begins with a solid setup. Pay attention to the following key elements:
a. Proper Alignment: Align your body and clubface to your target. Use alignment aids or markers on the course to ensure you’re aimed correctly.
b. Ball Position: Position the ball just inside your lead heel for a driver. This promotes a sweeping strike and an upward angle of attack, minimizing the chances of slicing or hooking.
c. Stance and Posture: Maintain a relaxed and balanced stance. Flex your knees slightly, keep your spine neutral, and let your arms hang naturally. Remember, a good posture sets the stage for a consistent swing.
2. Swing with Smooth Tempo:
Finding the right tempo in your swing is crucial for hitting straight shots. Rushing or over-swinging often leads to errant shots. Focus on the following aspects:
a. Start Slow: Begin your backswing smoothly, allowing your body to coil naturally. Avoid any sudden jerks or fast movements and remember you don’t have to over cock in your backswing to get solid distance off the tee.
b. Transition and Downswing: Transition smoothly from the backswing to the downswing, maintaining a consistent rhythm. Aim for a gradual acceleration through impact, allowing the clubhead to square up to the ball naturally. Key tip to remember here is you want your hips to beat your clubhead to the ball.
c. Follow-through: Complete your swing with a full and balanced follow-through. Maintain good posture, with your weight transferring smoothly onto your front foot.
3. Visualize Success:
Harness the power of positive energy by visualizing the shot you want to hit. Create a mental image of a straight, powerful drive soaring down the fairway. Believe in your ability to hit that perfect shot, and let that confidence fuel your swing. Golf is not an easy game and even the pro’s who practice for hours each and everyday hit bad shots, so don’t let a bad shot linger and follow you to the next shot.
4. Focus on Target, Not Distance:
While distance is important, accuracy should be your primary focus off the tee. Don’t get caught up in trying to hit the ball as far as possible. Instead, concentrate on hitting the ball straight towards your intended target. By focusing on accuracy, you’ll find that the distance will come naturally as you refine your swing. Between you and me I would rather be in the fairway than crushing my drive off the tee in some direction where my next shot is a mystery if I can even find it and playing with the same ball or two in a round is a win for me, I don’t know about you.
5. Practice with Purpose:
Consistent practice is the key to improvement. Develop a practice routine that focuses specifically on hitting straight shots off the tee. Use alignment sticks, swing aids, or training drills to reinforce good alignment, swing tempo, and ball striking. Regular practice sessions with a purposeful mindset will help you ingrain the correct habits. Like anything in life, the more you practice the better you will be and no matter how much you practice, bad shots will show up and what you do on your next shot is more important than the last bad shot. Keep it positive and positive results will follow.
Conclusion:
Hitting straight shots off the tee is a skill that can greatly enhance your golfing experience. With the principles of Positive Energy Golf, you can elevate your game to new heights. Remember to set up correctly, swing with a smooth tempo, visualize success, focus on accuracy, and practice purposefully. By incorporating these techniques into your game, you’ll find yourself hitting straighter shots off the tee and enjoying improved overall performance on the golf course. So go out there, embrace the positive energy, and let your drives soar down the fairway with unwavering accuracy!
-
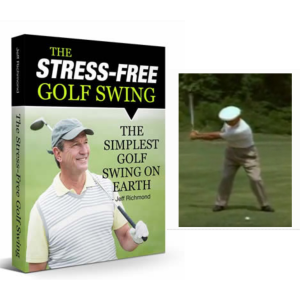
Ben Hogans Real Golf Swing Secret | The Stress-Free Golf Swing Review

Have you struggled with hitting consistent pure golf shots? I know when I am out on the golf course and hitting the ball pure I almost don’t care where the ball goes as the feeling of hitting a pure shot is just not like anything else and you feel so good afterwards you find yourself telling the others in your group “man I hit that one really go”.
Now, as good as that feels you would ideally want to be more consistent and more importantly more accurate as you and I both know hitting the ball from the fairway is much easier than searching for your ball in the long grass, fescue, woods, etc.. Another key to shooting lower scores is being able to hit more greens in regulation.
Did you know that in order for you to break 80 you will need to hit a minimum of 7 greens in regulation. The average golfer that shoots in mid 80’s to low 90’s only hits 2-4 greens in regulation. Think back to your last round, how many birdie chances did you have and how many of your pars were the result of a great 1 putt.
If you are tired of watching countless youtube videos, trying to figure out your swing and just getting more and more frustrated, you are not a lone. Let me introduce Ben Hogan’s Real Golf Swing Secret, which is surprising quick and easy to learn.
Hi, my name is Michael Ferrara,
I have been playing Golf since I was around 8 and took it seriously as a Freshman in High School. After High School, I was more interested in cars and girls which put Golf on the back burner. Flash forward 23 years and I am ready to get serious with my game and take it as far as I can take it.
With that being said, I needed to find something I could work on in my free time, which I stumbled across Ben Hogan’s Real Golf Swing Secret by Jeff Richmond and it has been game changer, which is why I wanted to share it with you.
Click here to learn ben hogan’s golf secret
My Review On The Stress-Free Golf Swing
At this point you are probably asking yourself what exactly is The Stress-Free Golf Swing and will it work for me and my golf swing?
Before we get into will this work for you, let me quickly answer your first question, what exactly is The Stress-Free Golf Swing?
The simple answer is, it is simply a digital program that aims to teach you “the simplest golf swing on Earth”
If your anything like me, your thinking yeah okay I have heard this before…
Well so did I, however, after reading the reviews and watching some youtube video’s on Ben Hogan’s swing I was sold and decided to purchase it and give it a try, after all what could it hurt, other that a few bucks.
The Stress-Free Golf Swing is usefully for golfers of all levels, from beginner to the most seasoned as it’s Ben Hogan’s swing, which he has been labeled as one of the best strikers of all time.
I will caution you that when you learn the secret you will need to go into with an open mind as it is really like nothing you’ve seen before.
My first surprise was how easily and quickly I was able to learn and incorporate this small move change in my swing. The best part is you are able to practice this from anywhere, at any time and you can learn it in as little as 5 minutes.
Now, I will tell you that this move is not regularly taught and will go against almost everything you have seen and heard. It will feel unnatural at first, however, I was really surprised at how fast it started to feel natural.
At this point you may be on the fence or just not convinced and trust me I get it, however, what if thinking this is a load of crap and will never work for me, thinking what if this works for me and I am able to consistently hit 14 or more green in regulation this year, how good will that feel and what will that do with your confidence.
Click the link below to get the full story of how Ben Hogan came up with this unique swing and how you too can start hitting more consistent pure shots.
Click here to learn ben hogan’s golf secret
Here’s what you will get with The Stress-Free Golf Swing
Everything you will need to replicate Hogan’s move, but you will also get additional tips, techniques and instructions on how to get the best results from this program.
Here is what is included:
- 160 Page Book in PDF Format (Digital Download)
- 21 Online Training Videos
- 1 Page PDF Cheat Sheet
- No Risk 60-day Trial – Money Back Guarantee
My Final Thoughts on The Stress-Free Golf Swing
I was very skeptical at first as I have seen tons of video, have tried a ton of different moves which all lead me to more confusion and frustration in my consistency of my golf swing. I would have awesome days out on the range on the course and other days where I was all over the place and when I had those days all these different techniques were running through my head, trying to get my swing figured out on the course just made matters worse. I am sure you can relate.
Now when I stumbled across Ben Hogan’s Real Golf Swing Secret, I thought what could it hurt. After learning his simple move I have to admit I got a little giddy as I thought really that’s it.. I took what I learned out to the range and yes it felt weird at first, however, after only a few swings I was hitting more pure shots and the sound of the ball coming off my club head was just awesome is the only way I can explain it.
The only downside to this program is that it is 100% digital which most things are now a days.
I am very happy with my purchase of The Stress-Free Golf Swing Program and I am even more excited to take what I have learned out onto the course this year.
The last thing I will leave you with is, if you are on the fence, just think about the what if this helps my game in anyway verses the other negative thought, you won’t be disappointed and if for any reason you are, they offer a full refund.
-
Mistwood Indoor Golf Dome Review | Bolingbrook, IL

Mistwood Indoor Golf Dome
Mistwood Golf Dome is located at 730 N Bolingbrook Dr (IL-53), Bolingbrook, IL 60440. They are open during the week (Monday -to- Thursday) from 8am to 10pm (11pm on Friday) and on the weekend from 7am -to- 11pm on Saturday and 10pm on Sunday.
It is recommended to reserve a bay ahead of time as they book up quick making walk-ins very difficult.Golf season for most of us living in the Midwest is April to November, if were lucky. Leaving us only a few off-season practice options to consider and one of those options is the Mistwood Golf Dome with Toptracer Technology.
If you are not familiar with Toptracer, it’s the technology that is able to track and trace your ball path during flight, which if you have watched any PGA Tour events on TV this is the magical line on the screen showing the balls path through the air, which in my opinion makes watching golf so much better.

Chipping Area
The chipping area is a decent size and is able to fit 3 golfers at a time, however, 2 is the preferred amount in my experience. There are multiple holes at varying distances for you to chip too. All in all this is a nice little chipping green for off-season practice.
Putting Area
Mistwood Golf Dome offers you two practice putting areas, one is located next to the chipping area and the other is located on the other side near the training area. I prefer the putting green near the training area as I find it a bit larger and is normally less crowded than the other area. I will note that the putting greens here are very fast, so easy does it.
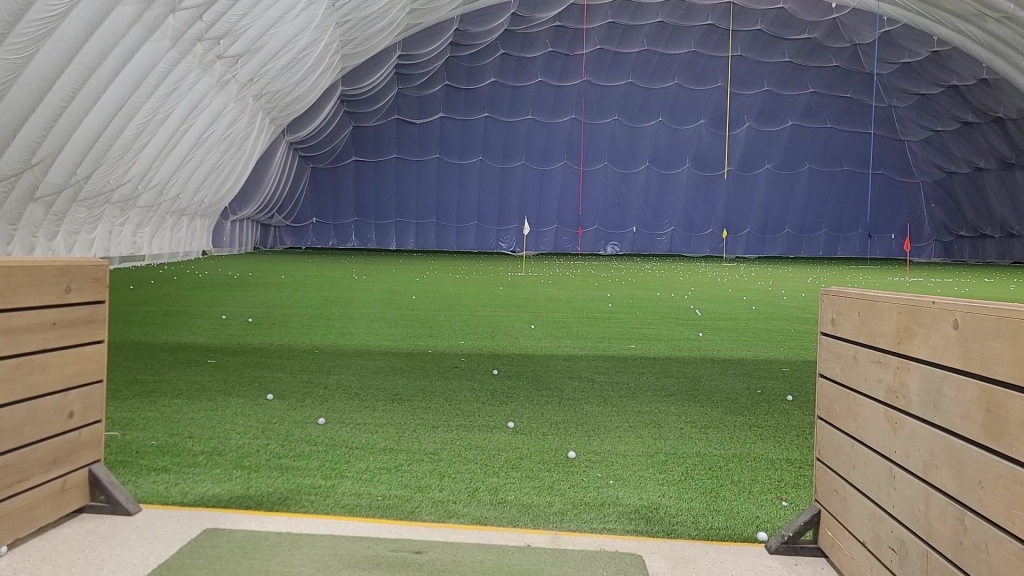
The Range
Mistwood Golf Dome offers 30 hitting stations to choose from both upstairs and on the main floor. Each bay has your typical artificial indoor hitting mat, unlimited balls, sitting area, and Monitor with Toptracer.
- Week Day Rates: $19.50 per half hour
- Weekend Rates: $22.50 per half hour
- Unlimited balls included at your bay, no need to purchase buckets or tokens
- Putting and Chipping Greens are available at no additional cost
- Toptracer Technology provides instant feedback with every shot and is also stored on the mobile app
Final Thoughts
Overall I really enjoy coming out to the Mistwood Golf Dome as it offers me the perfect off-season practice facility to keep the rust off my swing during the winter months. The other big factor is having the ability to hit the ball out onto the range verses a screen or net a few feet away from me. Toptracer technology not only provides instant feedback but offers different games to keep practice fun.
If you live in the area and are looking for a great place to hit some balls during the winter months or when the weather is just nasty outside I would highly recommend checking out the Mistwood Golf Dome.
-
How to Install SuperStroke Putter Grip Step-By-Step without a vise

SuperStroke Traxion Tour 3.0 Putter Grip
SuperStroke putter grips are taking the PGA by storm. I am sure you have noticed the fat putter grips many PGA Professionals are using now a days on their putters and if you are anything like me you are thinking to yourself what is the deal with the fat putter grips.
The short answer, other that they look awesome is the bigger diameter in your grip the more difficult it is to break your wrists during your putting stroke.
I can honestly say the putter grip looks amazing and feels really nice and comfortable in my hand. Now it did take a few putts to get use to the bigger grip, however, after a few putts I am really enjoying the feel of the bigger diameter grip.
Now the next big question, how hard is it to install on of these putter grips on my putter and is this something I can do my myself?
Ask no further as in this video I will show you step-by-step how easy it is to remove your old putter grip and install your new SuperStroke putter grip without using a vise in the comfort of your home.Step-by-Step How to Install SuperStroke Putter Grip
- Purchase your new SuperStroke Putter Grip – Check Prices on Amazon Here
- Gather all needed supplies to install your SuperStroke Grip (Double Sided Tape, Grip Tape Solution, Hook Blades, Utility Knife, Mud Pan, Acetone, and a towel)
- Grab your putter
- Remove old grip by inserting hook blade and pulling away from you, peel back the grip. If you have any tension just reinsert the hook blade as you are peeling back the grip, it should come off pretty easily.
- Remove old double sided tape. Use utility knife with a regular blade to scrape off the tape, it should come off pretty easily. Wipe it down with the acetone to remove the old glue.
- Measure double sided tape to the length of your new putter grip and cut it
- Apply the double sided tape to your putter leaving a little over hang at the top of the putter shaft, tuck the tape into the hole at the top of the putter shaft.
- Wrap the tape around the putter shaft and remove the other side of the tape exposing the outer sticky part of the tape
- Pour your grip tape solution onto your new putter grip holding it over your mud pan while plugging the hole on the bottom of your grip with your finger.
- Once the grip is full with the solution pour it over the double sided tape, which you can just pour it or remove your finder from the hole in the bottom of your grip and let it flow out over the grip tape, either way will work fine. Either way hold it over your mud pan so you don’t make a mess and can save the tap solution as you can reuse it.
- Slide your new putter grip onto the shaft and over the double sided tape, it should slide on very easily.
- Once on, tap the end of the club on the floor a few times to make sure your golf grip is all the way on.
- Once on you will want to line up your grip with SuperStroke facing front and the gray line facing back (SuperStroke should face the hole and the gray strip should face away from the hole when holding your putter) Please note that you have plenty of time to line this up so there is no need to panic and rush through this. Test is out before setting it aside to dry.
- Wait 3-4 few hours (I usually wait 24 hours) to give it time to dry.
Installing your new SuperStroke putter grip at home without using a vise is no big deal and should only take a few minutes to complete. If you have any issues, comments, tips or tricks I would love to hear from you. I again appreciate you taking the time to stop by and I hope you found this post useful.

SuperStroke Grip
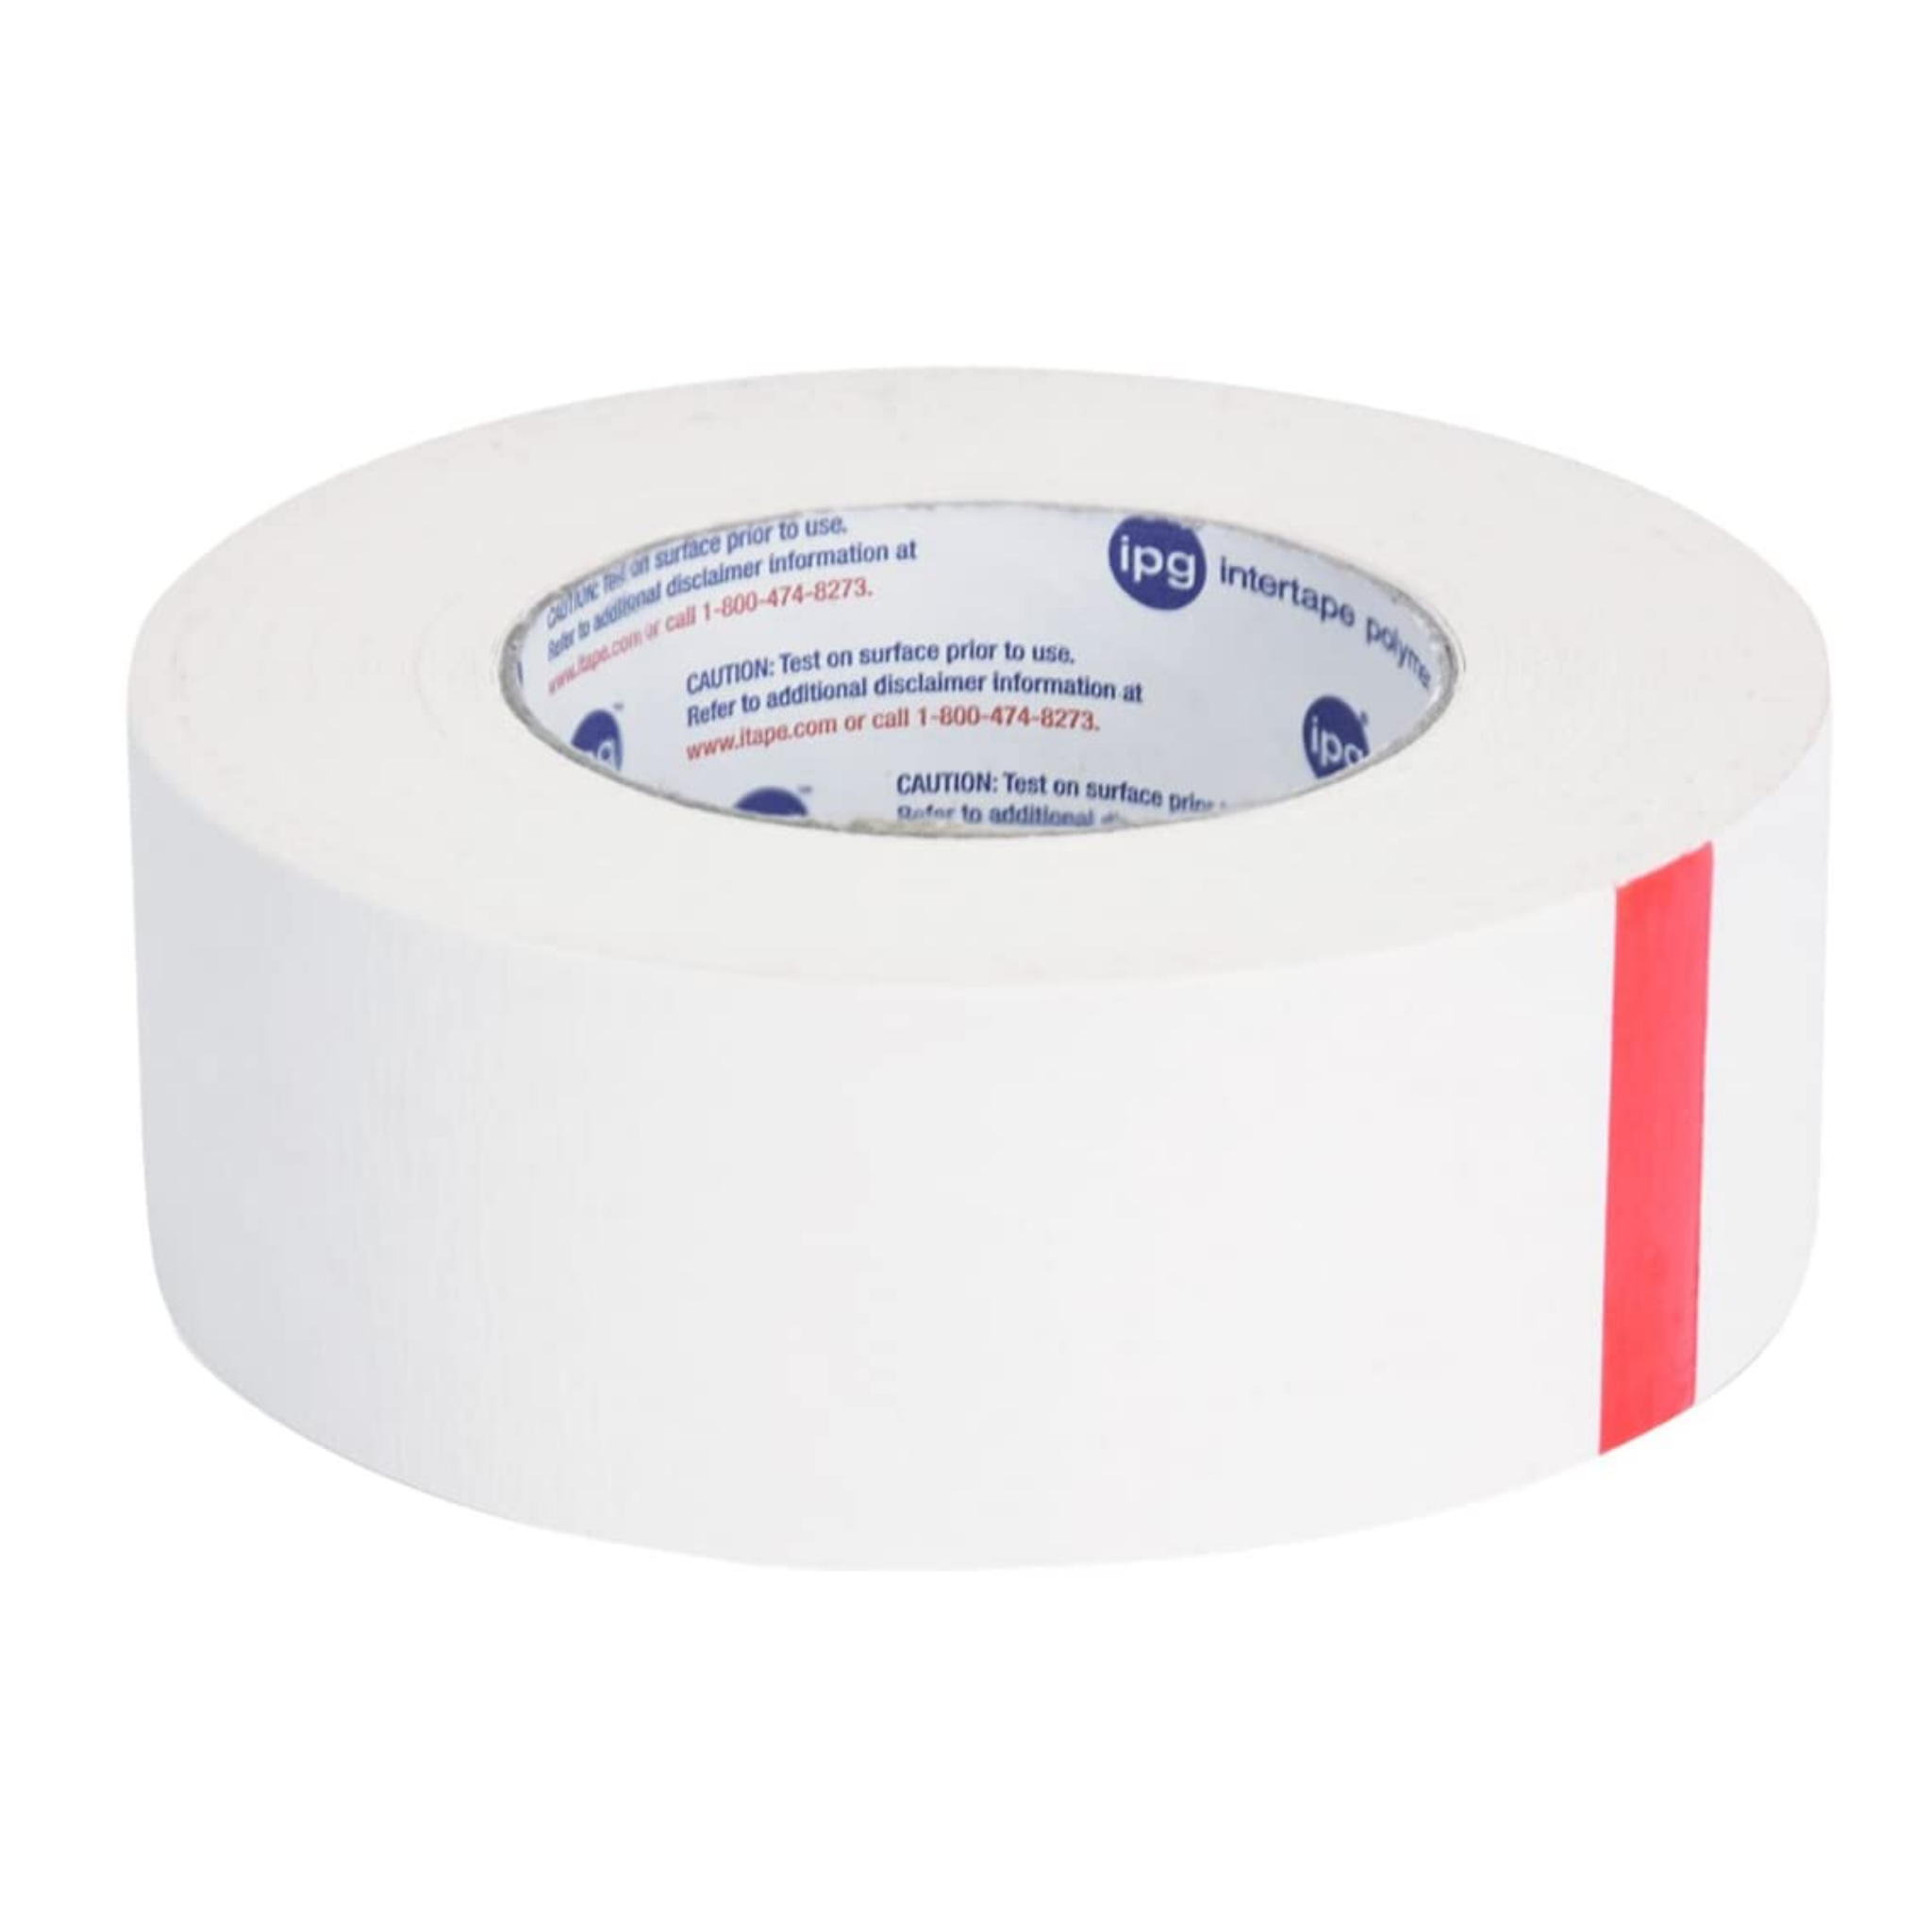
Double sided Tape
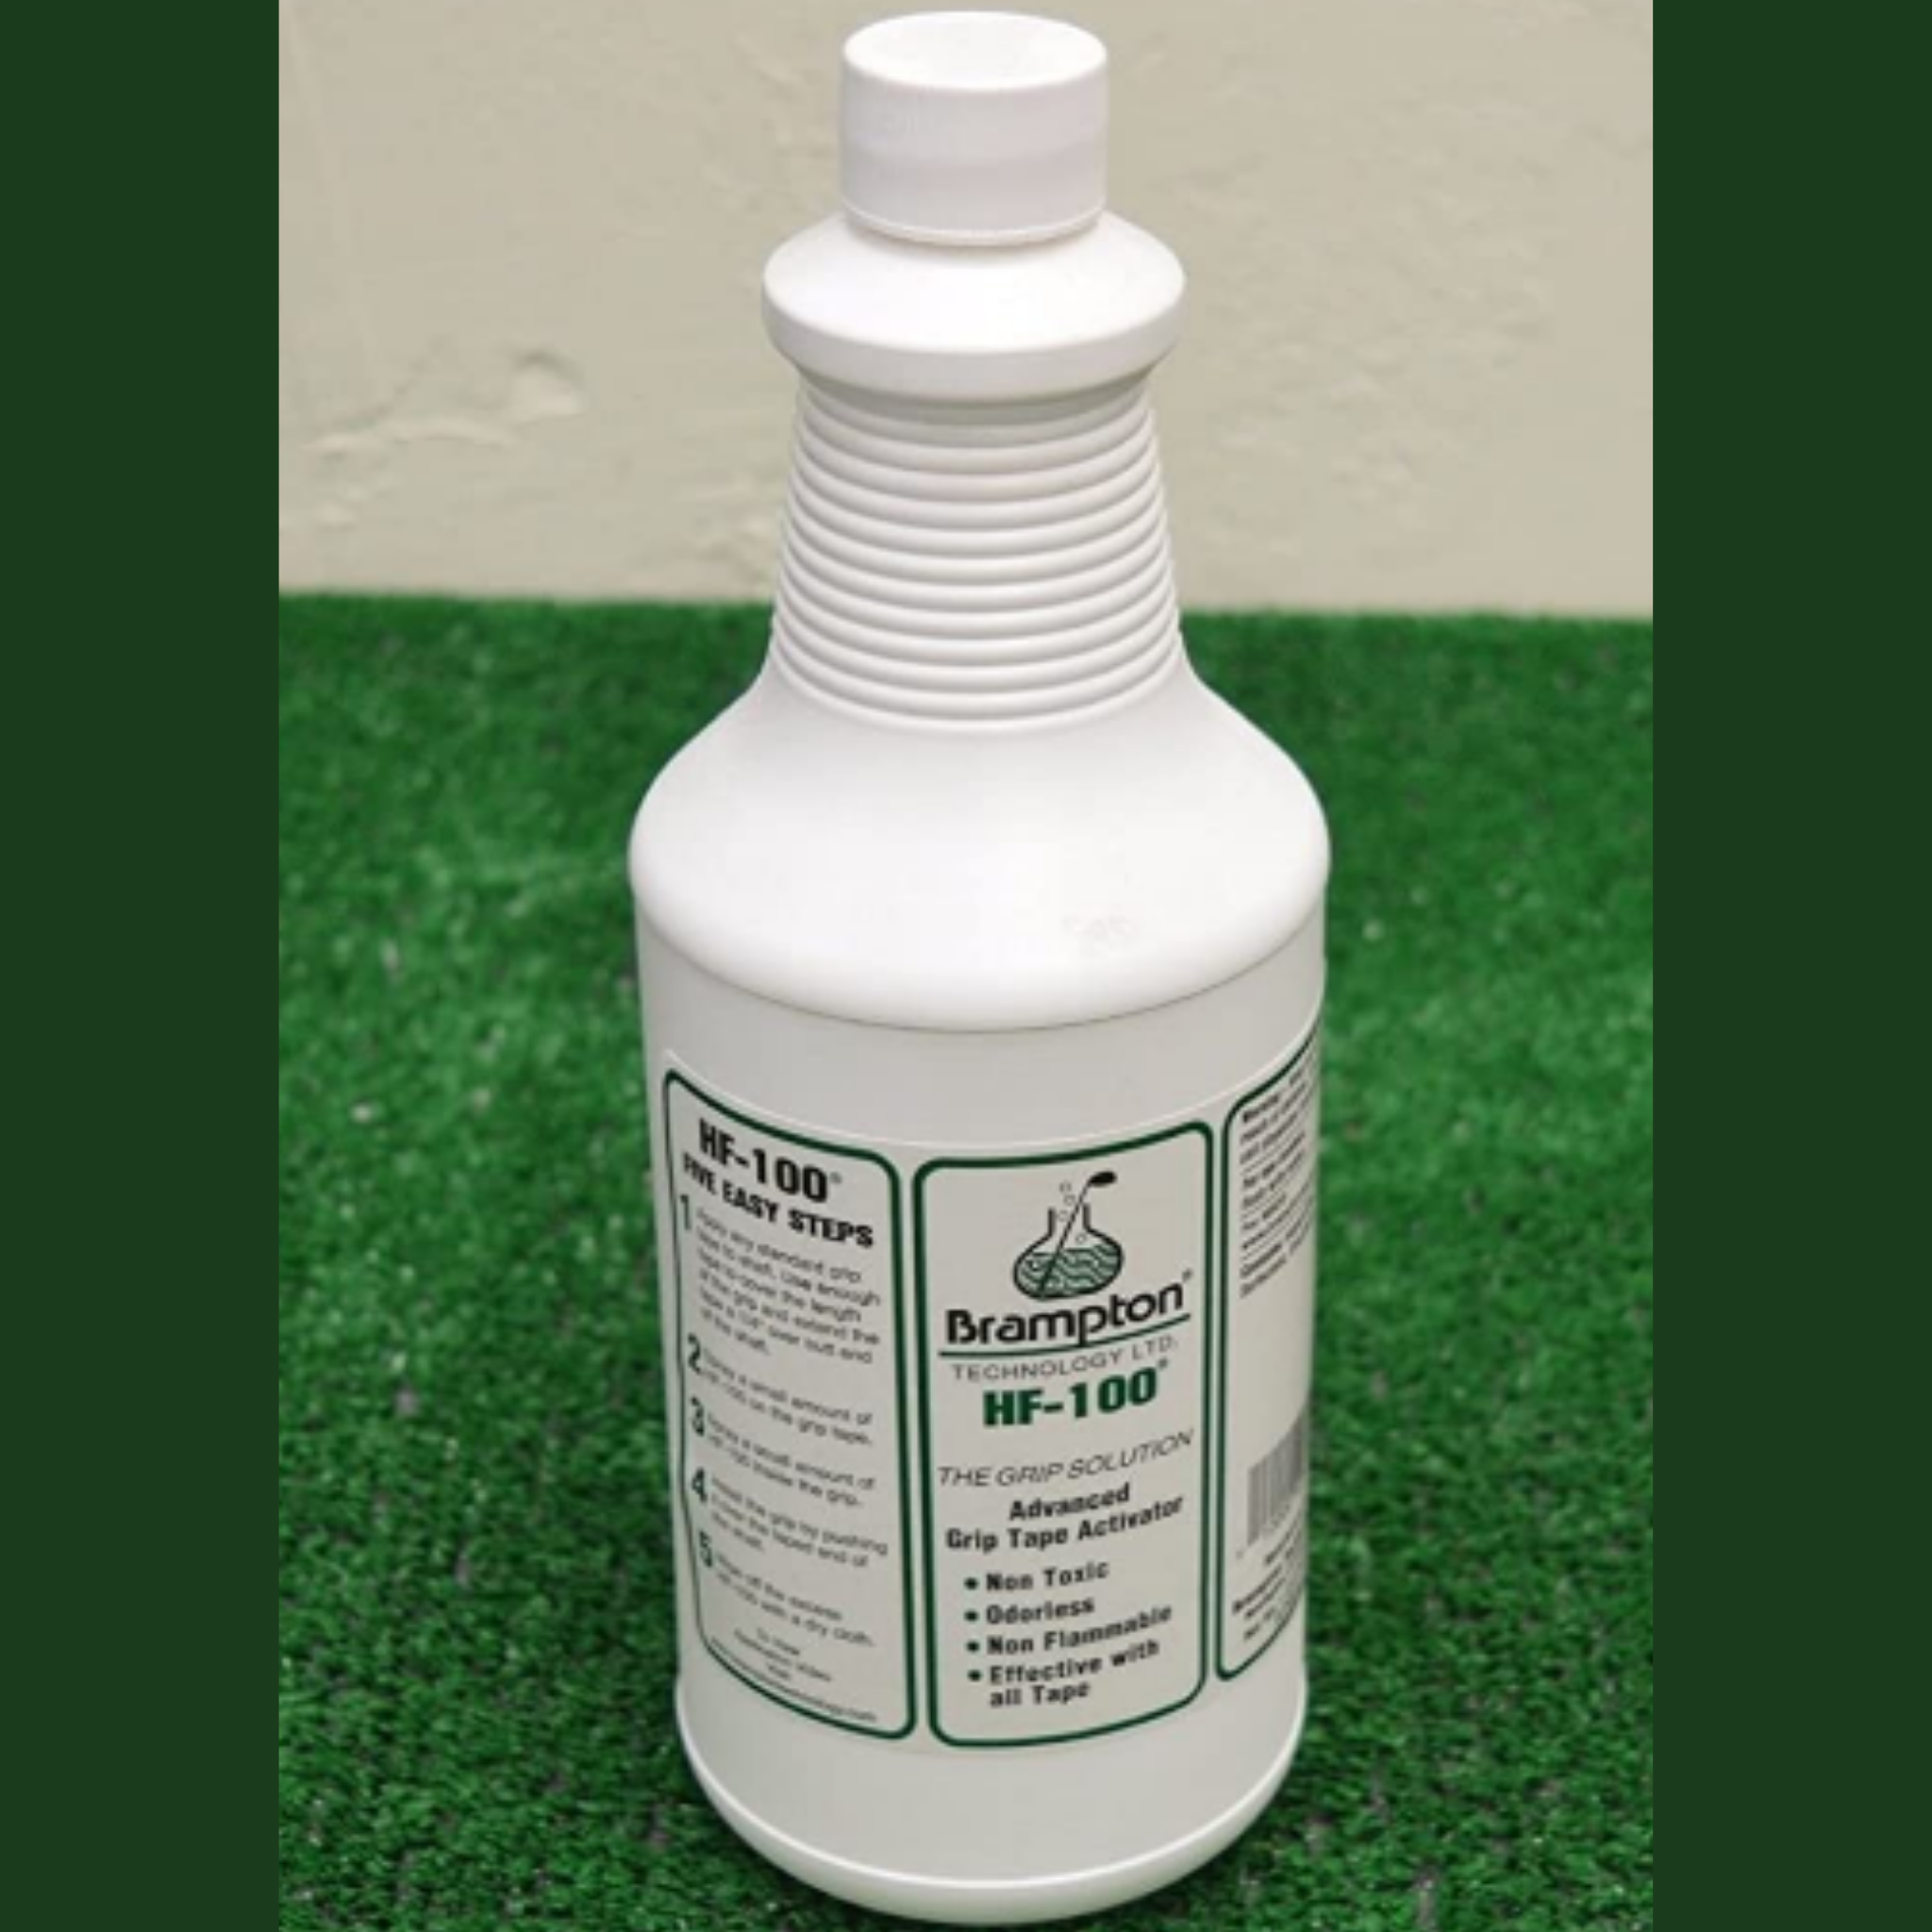
Grip Solution
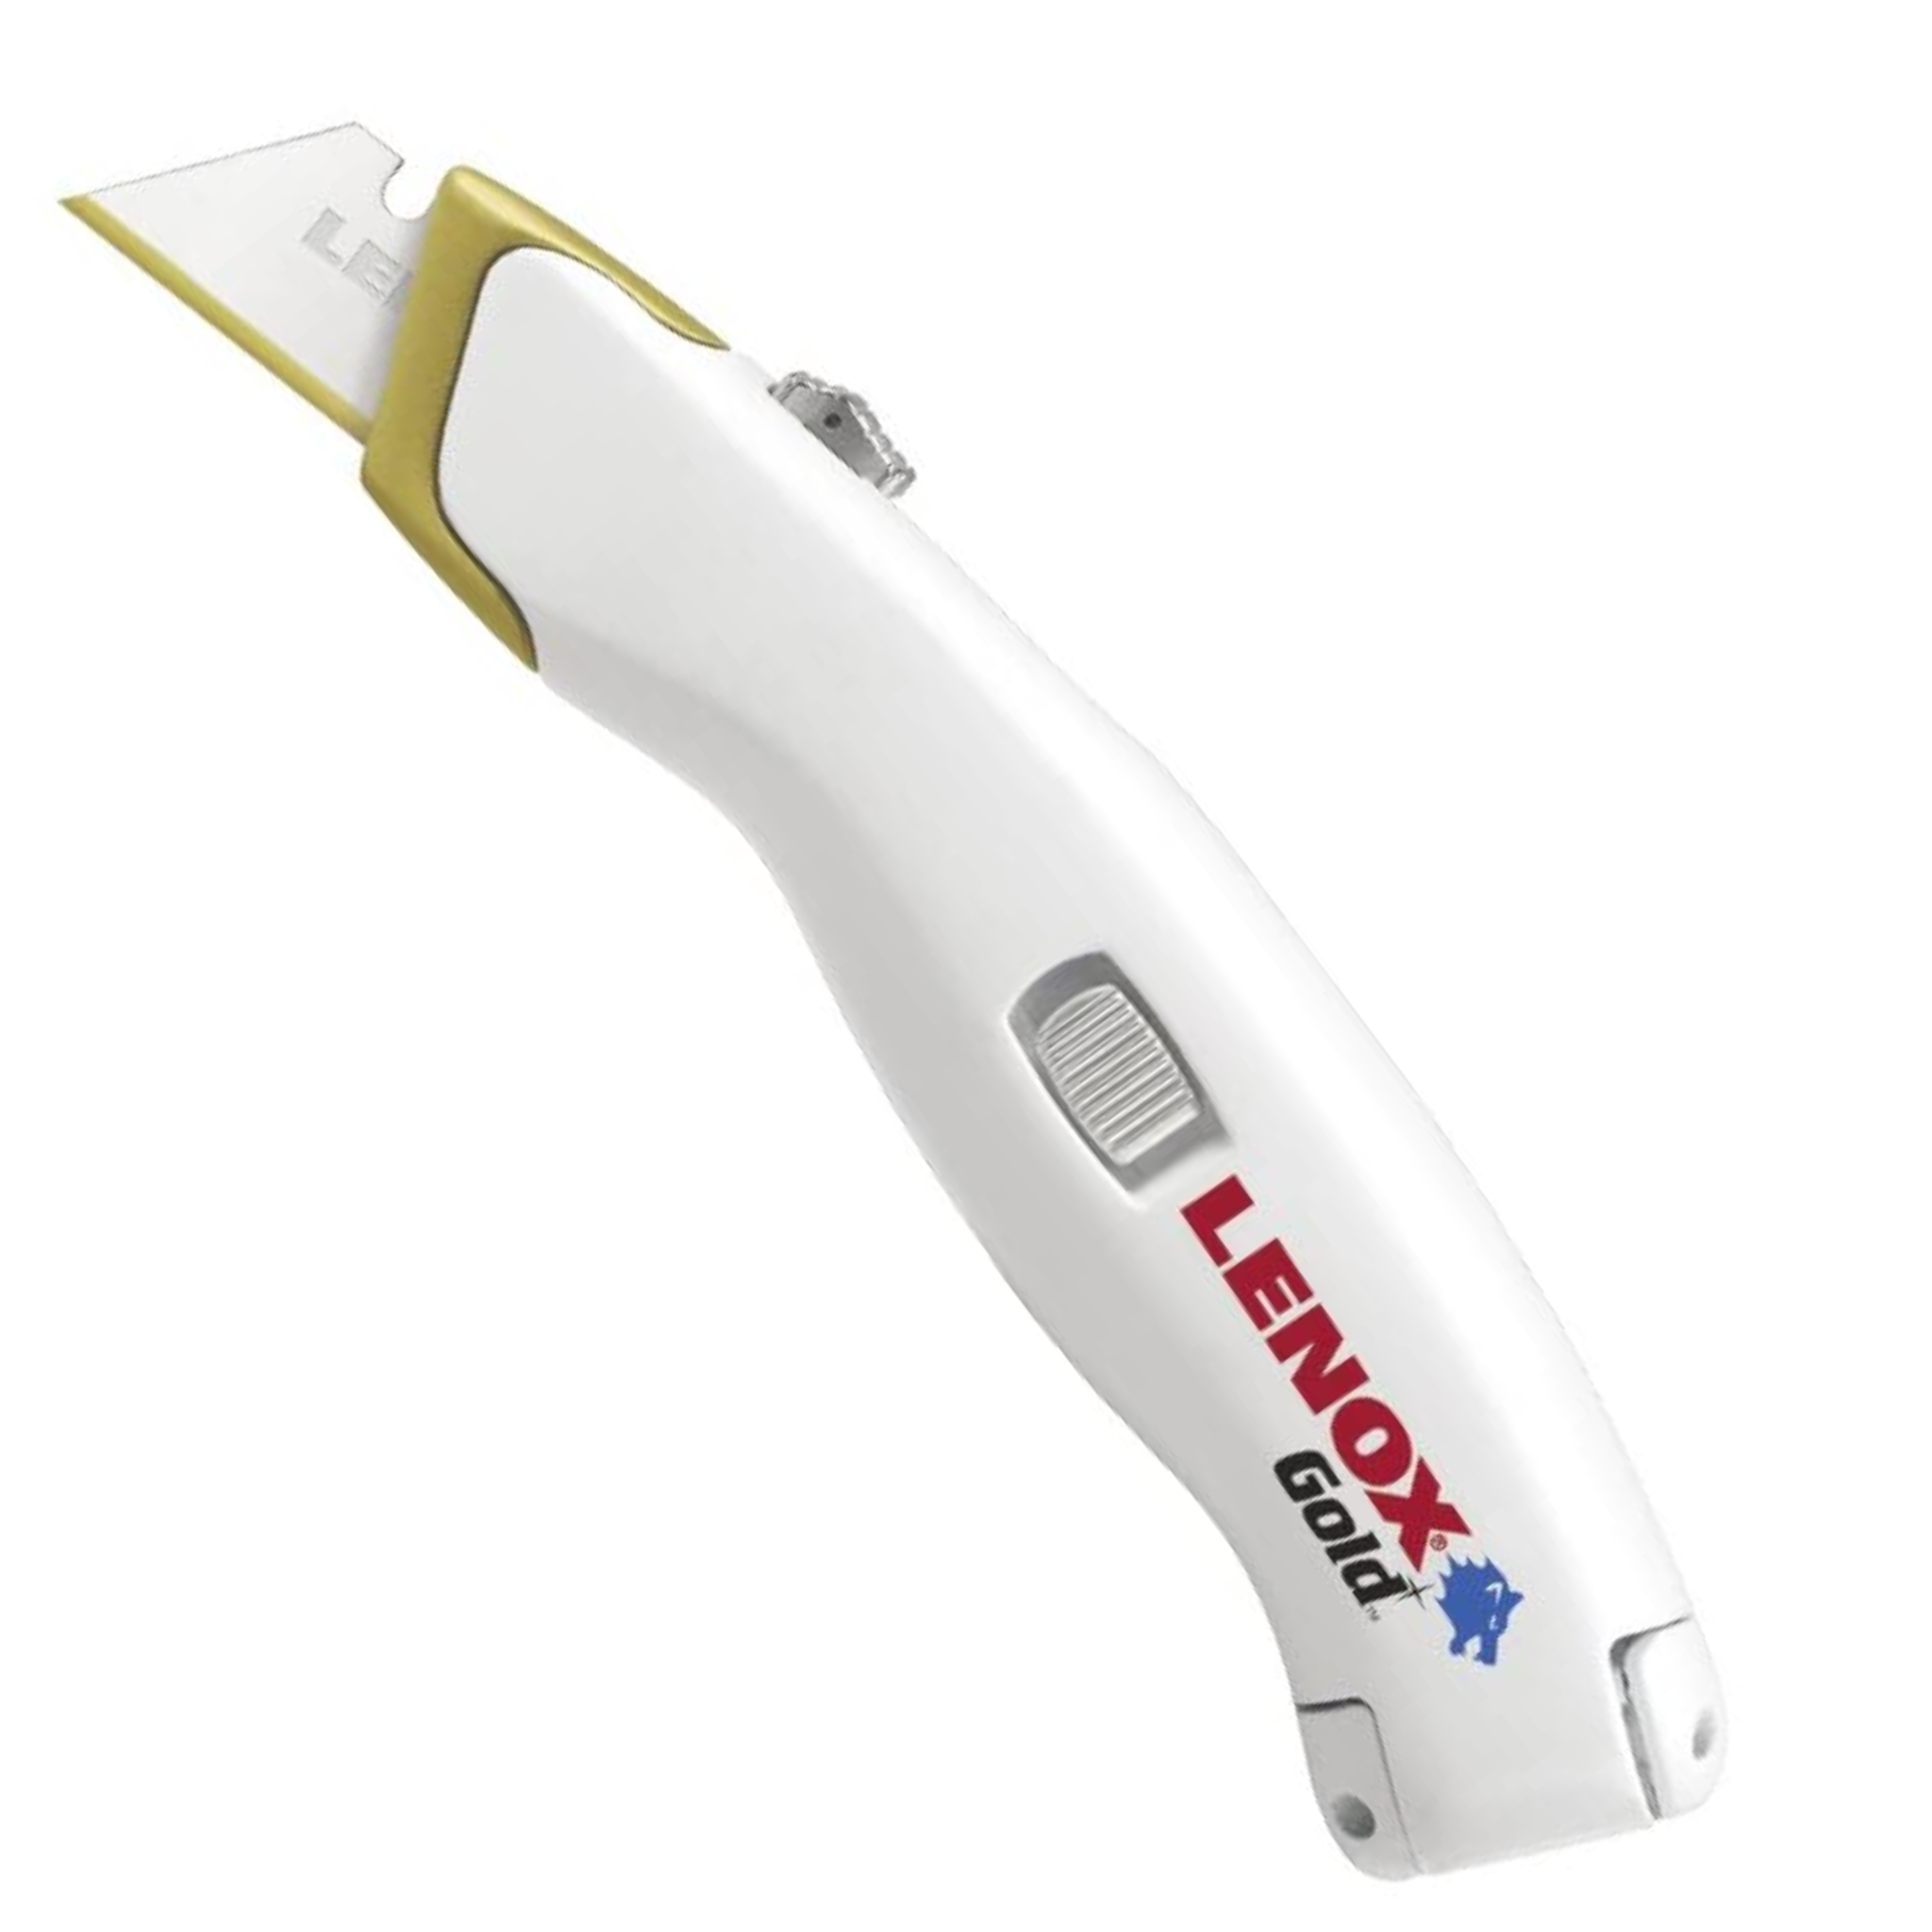
Utility Knife
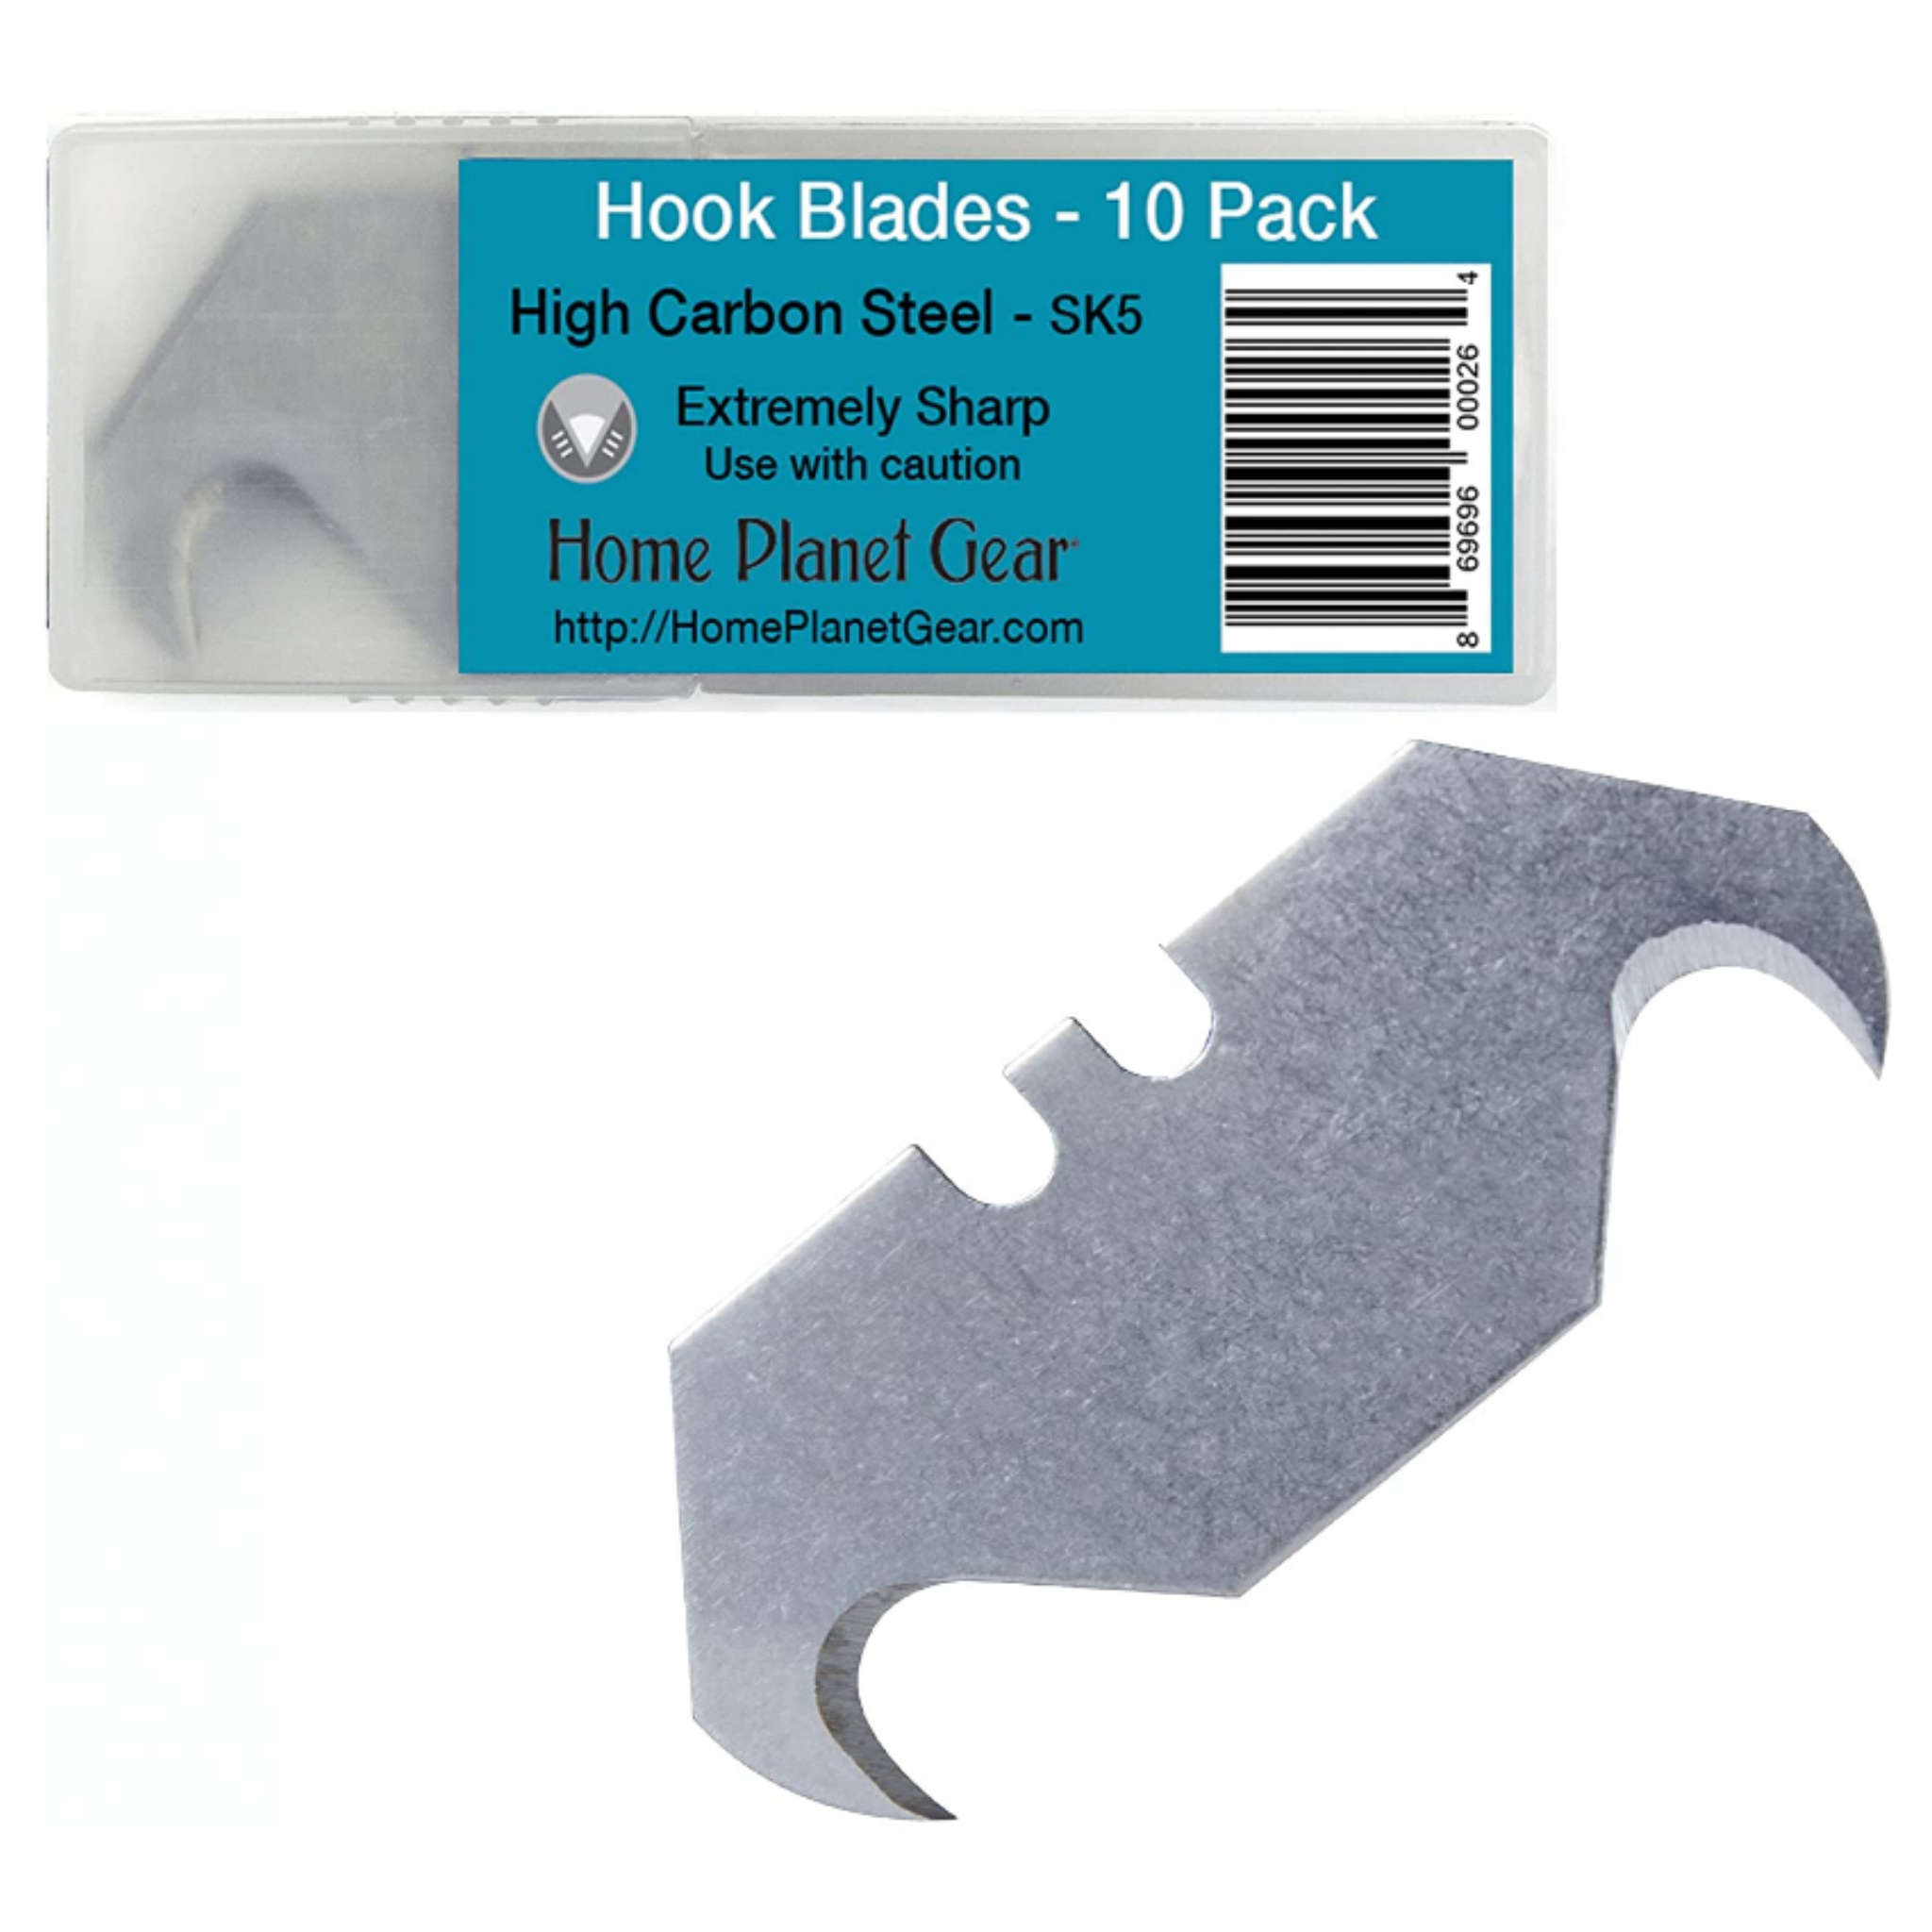
Hook Blades
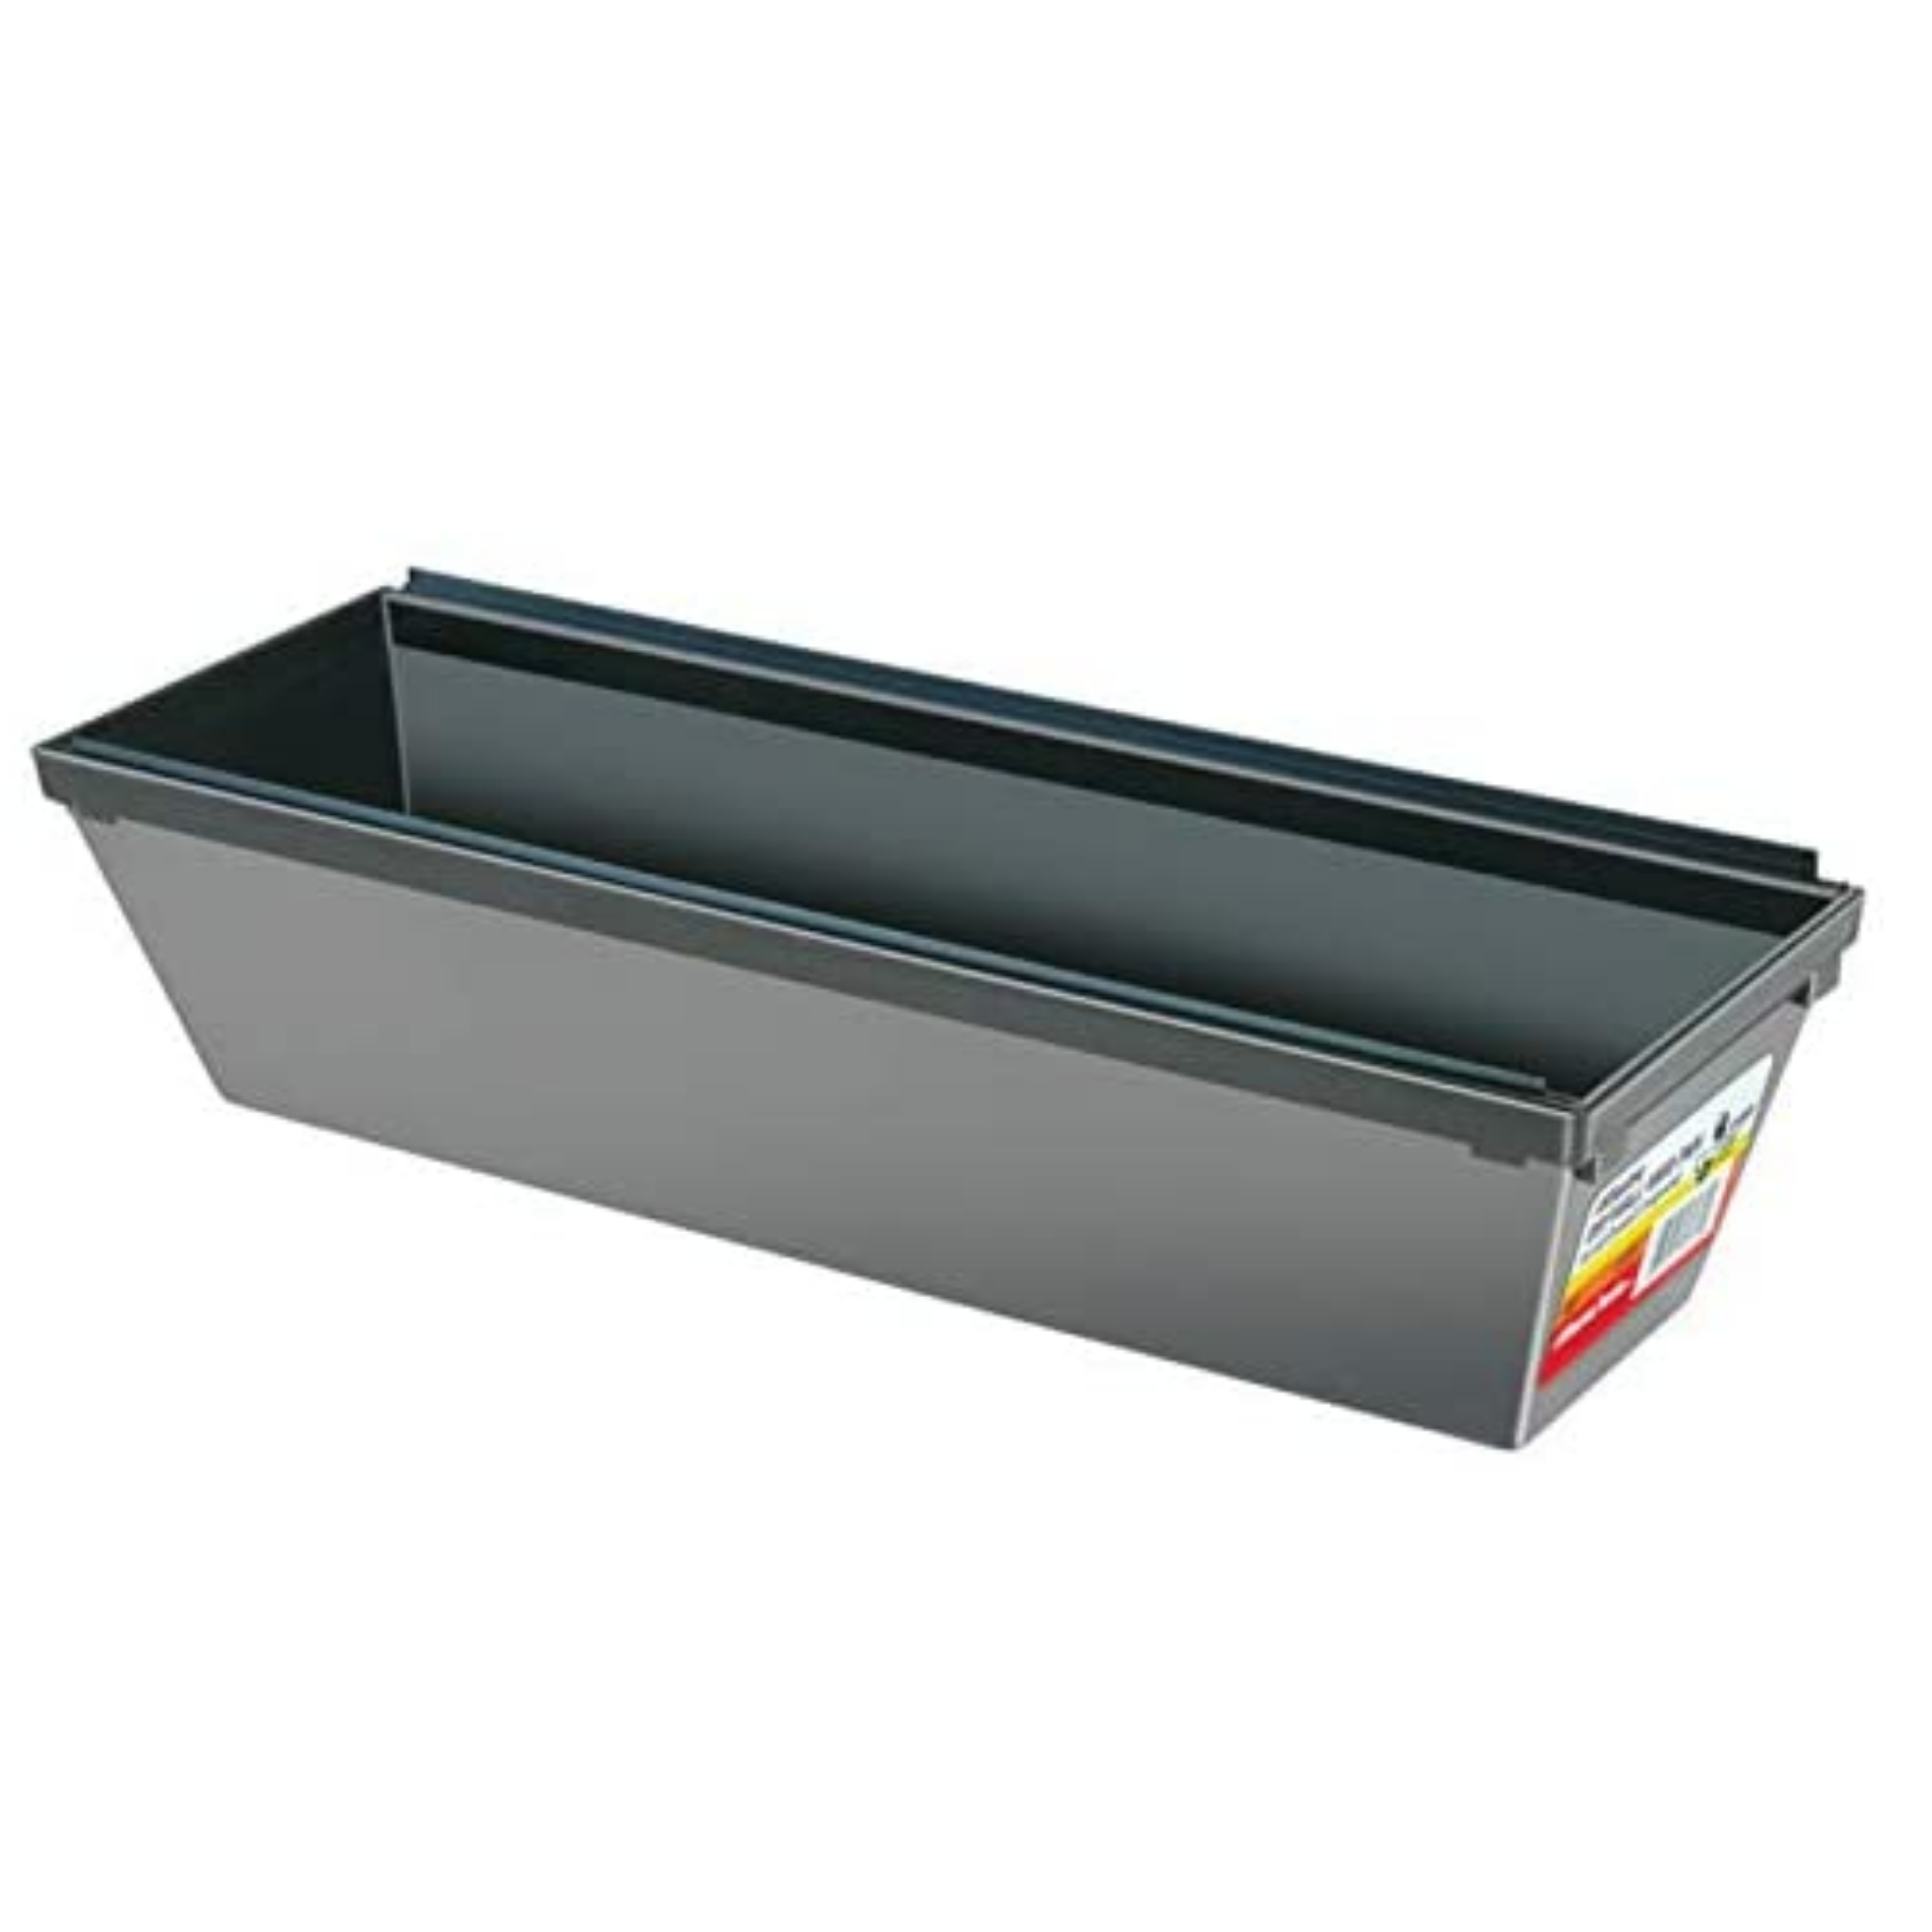
Mud Pan
-
PXG 0311 Forged 50 Gap Wedge Review + How to regrip to Golf Pride CP2 Wrap Grip

I was looking for a gap wedge to fill my 100 to 120 yard gap in my bag. I did my research and looked at a number of clubs as well as which degree wedge would fill my need. As you can guess I setteled on the PXG Forged 50 degree wedge, which you can see all the specs I selected when ordering the club here.
Which degree should I choose?
This is a great question and it all will depend on what need you are trying to fill. With that being said here are the typical yardage for the degree of wedge you choose:
- 50 degree = 115 yards
- 52 degree = 106 yards
- 54 degree = 100 yards
- 58 degree = 84 yards
The above averages will be a good starting point for you when thinking about adding a new gap wedge to your bag.
Chipping with 0311 PXG 50 degree wedge
Chipping around the green with the PXG 50 degree wedge was crisp and easily to get on target consistently at different distances. In comparing a 60 degree wedge to using a 50, I would personally go with the 50 over the 60 for most chips around the green. Overall I was very happy with the control and ease to get the ball off the ground and on target.
PXG 50 degree on the range
Looking down at the club head at address, it was a bit smaller than I am use too since this is more of a blade style club, however, after a few swings I really liked the look and feel of this club. Consistency was decent for my first few swings, which you can see in the image below and it just kept getting better and better with more swings. The ball flight was very good, yardage was impressive. Yardage was consistently in the 125 – 130 yardage range as I got more comfortable with the club.
Range summary and short review video
PXG 0311 Forged 50 Gap Wedge Review & Step-by-Step chaging PXG grip to Golf Pride CP2 Wrap Grip
Final thoughts | PXG 0311 Forged 50 degree Gap Wedge
Overall I am very impressed with the PXG 0311 Forged Gap Wedge. I was very comfortable swinging the club. The ball flight and distance was right where I wanted it. I am very happy with the PXG 0311 gap wedge and I am looking forward to getting it out onto the course to see how it performs on the course. If you are looking for a gap wedge I would suggest you check out the PXG 0311 Forged gap wedge as it is a great club at an awesome price tag. Check out my video on building my gap wedge here.
I hope you found this review useful and I would love to hear what you think of the PXG 0311 gap wedge below. I again appreciate you and I hope you hit em straight and down the middle.
Everything you need to re-grip your golf club:
Double Sided Golf Grip Tape
Golf Grip Tape Solution
Utility Knife
Hook Blades
Mud Pan – Solution Pan
-
Step-by-Step How to grip a golf club easily for beginners without a vise
Did you know that it is recommended to regrip your golf clubs every year or more depending on how much you play?
No, well neither did I, so you are not alone by any means. I did have one of my drivers regripped at the course and it cost me $35 to have 1 club regripped with Golf Pride CP2 Wrap Grip, which got me thinking how hard could it be to regrip my own clubs at home.
In the video below I will walk you through how to regrip your golf clubs at home without using a vise, now if you have a vise I am sure it will make he process that much easier, therefore, if you have one, I would go ahead and use it.
I will also provide links to all the things you will need to easily regrip your golf clubs at home.
Step by Step How to Change Golf Grips without Vise
- Find and purchase your new golf grips – Research and Purchase Golf Pride Grips Here
- Gather all needed supplies to regrip clubs (Double Sided Tape, Grip Tape Solution, Hook Blades, Utility Knife, Mud Pan, Acetone, and a towel)
- Gather clubs in which you will be changing the grips
- Remove old grip by inserting hook blade and pulling away from you, peel back the grip. If you have any tension just reinsert the hook blade as you are peeling back the grip, it should come off pretty easily.
- Remove old double sided tape. Use utility knife with a regular blade to scrape off the tape, it should come off pretty easily. Wipe it down with the acetone to remove the old glue.
- Measure double sided tape to the length of your new golf grip and cut it
- Apply the double sided tape to your golf club leaving a little over hang at the top of the club shaft, tuck the tape into the hole at the top of the golf club shaft.
- Wrap the tape around the club shaft and remove the other side of the tape exposing the outer sticky part of the tape
- Pour your grip tape solution into your new golf grip holding it over your mud pan while plugging the hole on the bottom of your grip with your finger.
- Once the grip is full with the solution pour it over the double sided tape, which you can just pour it or remove your finder from the hole in the bottom of your grip and let it flow out over the grip tape, either way will work fine. Either way hold it over your mud pan so you don’t make a mess and can save the tap solution as you can reuse it.
- Slide your new golf grip onto the shaft and over the double sided tape, it should slide on very easily.
- Once on, tap the end of the club on the floor a few times to make sure your golf grip is all the way on.
- Once on you will want to line up your grip to the spot where you want it and to make sure it is not crooked. You will see a white line on the top and bottom of the grip, make sure those lines are lined up and you will be good to go. Please note that you have plenty of time to line this up so there is no need to panic and rush through this.
- Wait 3-4 few hours (I usually wait 24 hours) to give it time to dry before testing it out.
So there you have it, how to easily regrip your golf clubs from home without using a vise. If you are anything like me, you will be looking for more clubs to regrip, lol.
If you have any questions, comments or if I can help in anyway leave a comment below and I will be honored to help. I appreciate you taking the time to view this blog post and I wish you the best of luck on regripping your clubs easily at home.
Everything you need to regrip your clubs at home:
Intertape 591 Premium Double Sided Golf Grip Tape

Golf Pride CP2 Wrap Grips
Brampton HF-100 Grip Tape Solution
LENOX Gold Utility Knife
Hook Blades | 10 Pack
Advance Black Mud Pan